


Taking a screenshot on an iPhone is one of the easiest things to do. If you’re new to owning an iPhone, you may have even learned by accident when trying to turn it off. If you want to be able to capture more than what’s being shown, you can take a full page screenshot on your iPhone. In this article, I’ll show you how to screenshot on an iPhone!
1. Take a Screenshot on iPhone Using Physical Buttons
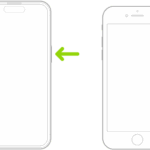
To take a screenshot on an iPhone, simultaneously press the side button and the volume up button. You’ll see a flash on the your iPhone’s display which indicates that a screenshot has been taken.
2. Take a Screenshot on iPhone Using Siri
You may not have realized that one of Siri’s lesser-known tricks is taking a screenshot for you. Simply summon Siri by saying "Hey Siri" or pressing and holding the side button. Say, "Take a screenshot," and after a moment, Siri will acknowledge the request and take a screenshot as normal.
This method comes in handy if your hands are dirty, or when you can’t perform the gesture to take a screenshot for whatever reason.
3. Take a Screenshot on iPhone by Tapping Its Back
For even more convenience, you can use an iPhone accessibility shortcut to take screenshots without the buttons. This feature is called Back Tap and allows you to perform actions simply by tapping the back of your iPhone with your fingers.
To configure it, go to Settings > Accessibility > Touch > Back Tap. You can customize two actions that happen when you tap twice and three times on the back of your device.
Tap Double Tap or Triple Tap, and then select Screenshot to take a fast screenshot with a few taps.
4. Take a Screenshot on iPhone Using AssistiveTouch
Another way to take a screenshot on an iPhone without pressing buttons is by using AssistiveTouch. This accessibility feature puts a button on your screen that you can use to perform multiple tasks, like taking screenshots.
To turn on AssistiveTouch, open your iPhone’s Settings app and tap Accessibility. On the Accessibility page, tap Touch. Tap AssistiveTouch and toggle it on in the subsequent menu. This will add a white circular button on top of your screen.
Whenever you tap this AssistiveTouch icon, it opens a menu that provides quick access to various functions. To easily add screenshot functionality to the menu, select Customize Top Level Menu from the AssistiveTouch settings menu.
Here, tap an icon you’d like to replace and choose Screenshot from the list of actions. You can also add another icon by tapping the Plus button and assigning the Screenshot action to it.
If you’re not a fan of tapping through these menus, there’s a faster way to take screenshots on iPhone using AssistiveTouch. On the AssistiveTouch settings menu, select the Single-Tap, Double-Tap, or Long Press option and set it to Screenshot. Then, quickly tap once, twice, or press and hold the AssistiveTouch button to take a screenshot on your iPhone.
This is even more convenient, as you don’t have to show the full AssistiveTouch menu that takes up screen space. If you find the AssistiveTouch button annoying, lower the Idle Opacity in the settings menu to make it more transparent when you’re not using it. You can drag the button to any corner of the screen you like when you’re not using it.
Now, all you need to do is select Screenshot from the AssistiveTouch menu or perform your assigned tapping shortcut, and your iPhone will take a screenshot. This works just like the usual method of taking an iPhone screenshot with the buttons. When you take a screenshot, the AssistiveTouch button and its menu won’t appear in the image.
Where Do Screenshots Get Saved?
After you take a screenshot on your iPhone, it gets saved to the Photos app. To see all of your screenshots in one place, open Photos, tap Collections, scroll down to Media Types, tap Media Types, then tap Screenshots. You can edit, delete, or share screenshots just like you would any other picture saved in the Photos app.
Take a Full Page Screenshot on iPhone
A full-page screenshot, or scrolling screenshot, captures an entire page — webpage, document or email — without you having to take multiple screenshots and then stitch them together. For example, if you wanted to screenshot a 116-page document in Safari, you would only have to take a single screenshot to capture the entire thing.
To take a full page screenshot on your iPhone, first take a regular screenshot by simultaneously pressing the side button and volume up button. You’ll see two options: Screen and Full Page. Select Full Page.
If you need to trim down how much of the page is included, select the Crop tool at the top of the screen and make your adjustment. When you are finished editing, hit Done.
Finally, tap Save PDF to Files or Save to Photos (if available) to save the screenshot.
If you’re saving the screenshot to Files, you must choose a folder to save it in. By default, the Files app will select the last folder you saved something to or the Downloads folder.
Before, you could save long screenshots only as PDF files. And that’s sort of still true — depending on the length of your screenshot.
The most obvious way to see if your scrolling screenshot can be saved to your photo reel is to just check by doing the steps above. The option to save the screenshot to your photos will either be there or it won’t.
Where to Find Full Page Screenshots on iPhone
As mentioned above, extra-long screenshots are automatically converted to PDFs, so they’re saved to the native Files app. To see full page screenshot on your iPhone, open the Files app, go to the folder in which your screenshot was saved and tap the screenshot.
Here you can rename the file, draw on it, leave comments and more. You can also share the scrolling screenshot, but the other person must have Files or another PDF-reader to view it.
If you saved your screenshot to your Photos app, then that’s where you can expect to find it.
Now you know how to take a screenshot on your iPhone, even if you can’t use the physical buttons.